By Ramsha Irfan on Dec 30, 2023
~ 4 minutes to read
Apple launched its iPhone 17 at the WWDC event in June 2023. The iPhone 17 did not have the Journal App, but there has been immense hype since then. Apple launched iOS 17.2 with the Journal App on December 11, 2023. Curiosity about the Journal App, its features, and its usage has surged among many. This article has covered all you need to know about the Journal App.
Journal App is a complete reflection of writing diaries about our daily activities, memories, dreams, and much more we used to do in our childhood, and many have continued the practice. With the Journal app, you can write and add pictures of any recent activity, gathering or place you have visited recently or a long time ago. Today, mental health issues such as anxiety, depression, tension, etc, are escalating day by day. Hence, the Journal App will allow you to jot down your personal feelings, thoughts, or anything that bothers you all the time.
The best part about the Journal App is that it gives suggestions regarding what to write according to the activities on your phone. For example, if you have completed your trip to Europe or any other place, it will suggest to write about it. You can also reflect on your old memories by adding photos and texts or scrolling through the ones you have already added.
Following is the step-by-step guide about using the journal app and customizing the settings according to your preference.
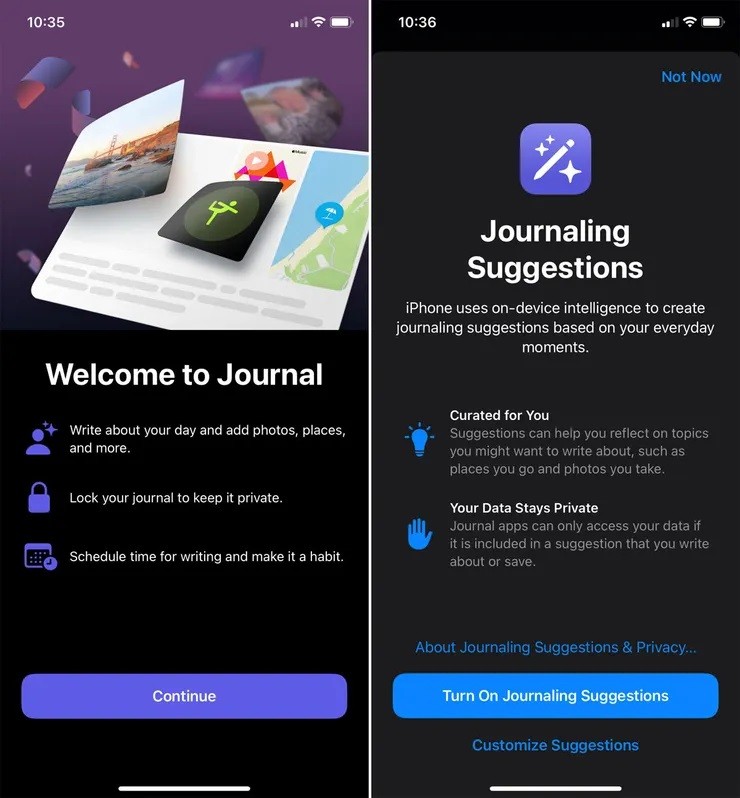
Once you open the Journal App on your iOS 17.2, a welcome with an intro about the app will appear on the screen. Press ‘continue’, and a blank screen will appear, with a ‘+’ at the bottom. Press the ‘+’ icon, and then a new screen with ‘Journaling Suggestions’ will appear.
There are two options on the screen regarding suggestions. If you select ‘Turn on Journaling Suggestions’, it will provide you with topics to write on based on the activities on your phone or general suggestions such as any advice you have received, how you spend the weekend, etc.
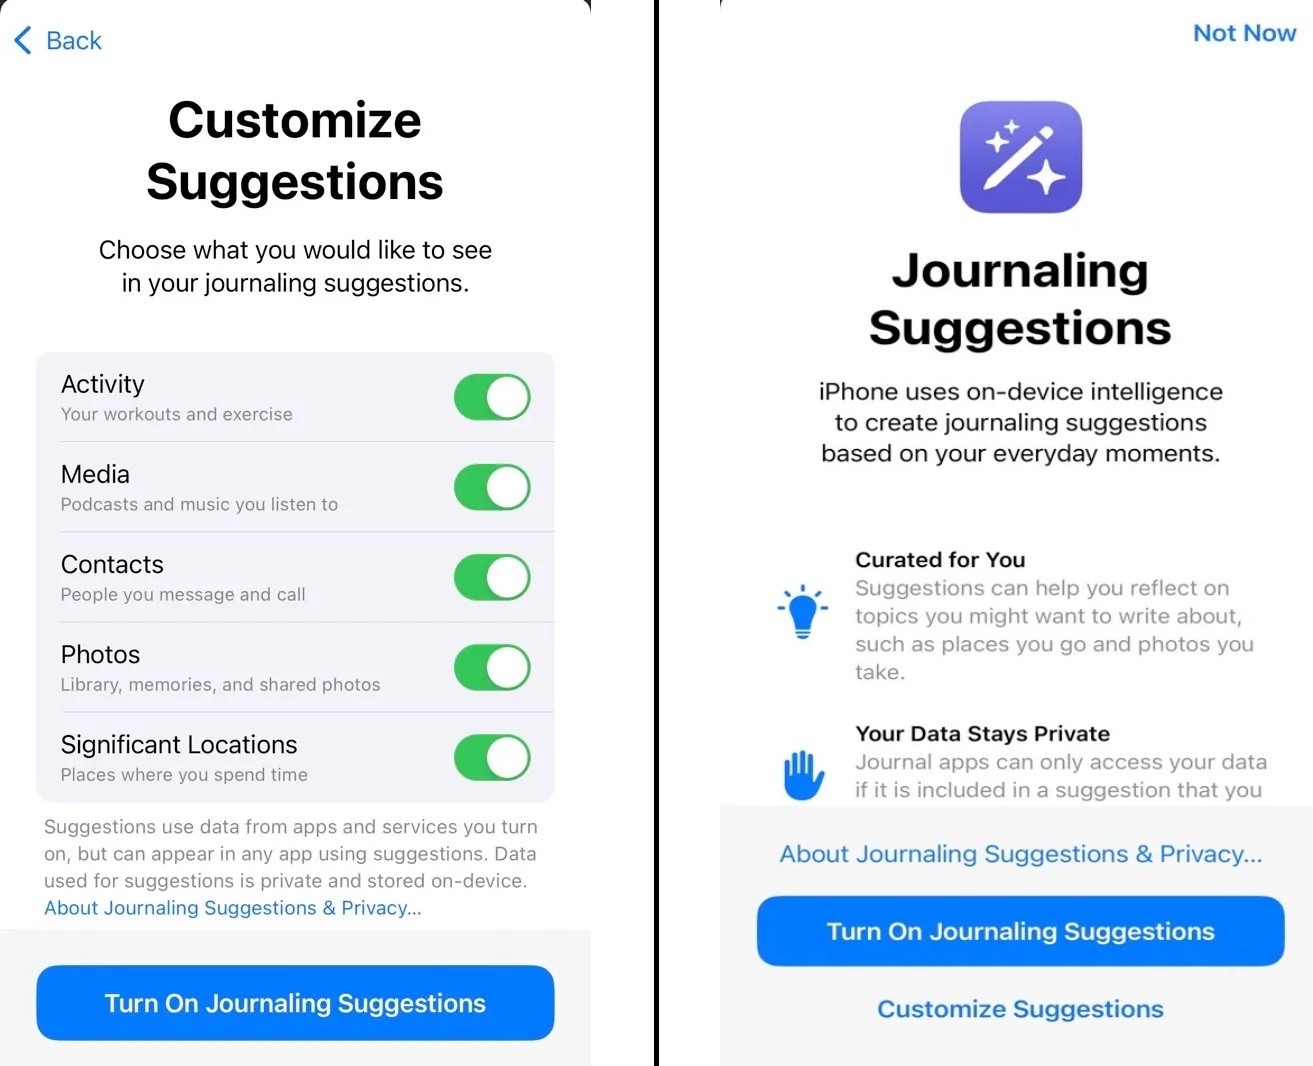
Another option at the bottom of the screen, ‘Customize Suggestions’ allows you to choose exactly what the app can learn about you. Once you select this option, a screen with a list of activities the app can track will appear, with a button in front of each option. You can toggle on/off any activity/activities according to your preference. Click the ‘Turn On Journaling Suggestion’ option when done. Select the ‘New Entry’ and start writing the Journal entry.
If you don’t want any suggestions, you can click the ‘+’ option at the bottom of the blank screen that appears after the ‘welcome’ screen and then click the ‘Not Now’ option at the top right corner of the Journaling screen.
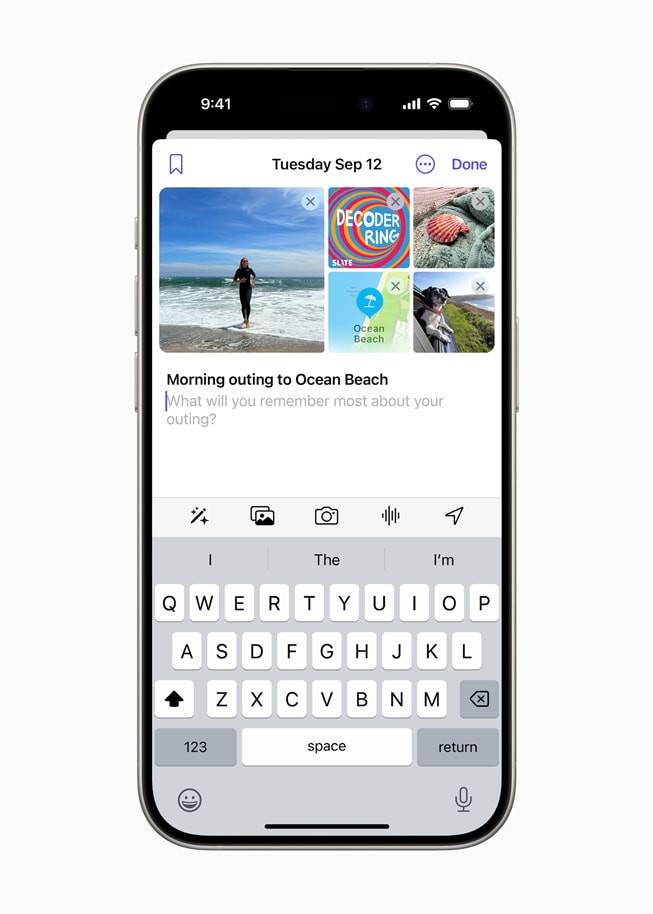
A journal entry with text only seems boring to many. Therefore, the Journal App provides the option to add visuals to the journal entry. The toolbar on the screen contains 5 options, which include suggestions, pictures on your phone, camera to take pictures instantly, audio to record the entry or anything related to the entry that may seem difficult to type, and a location option to add a pinpoint one. Once it's completed, click the ‘Done’ option at the top right corner of the screen.
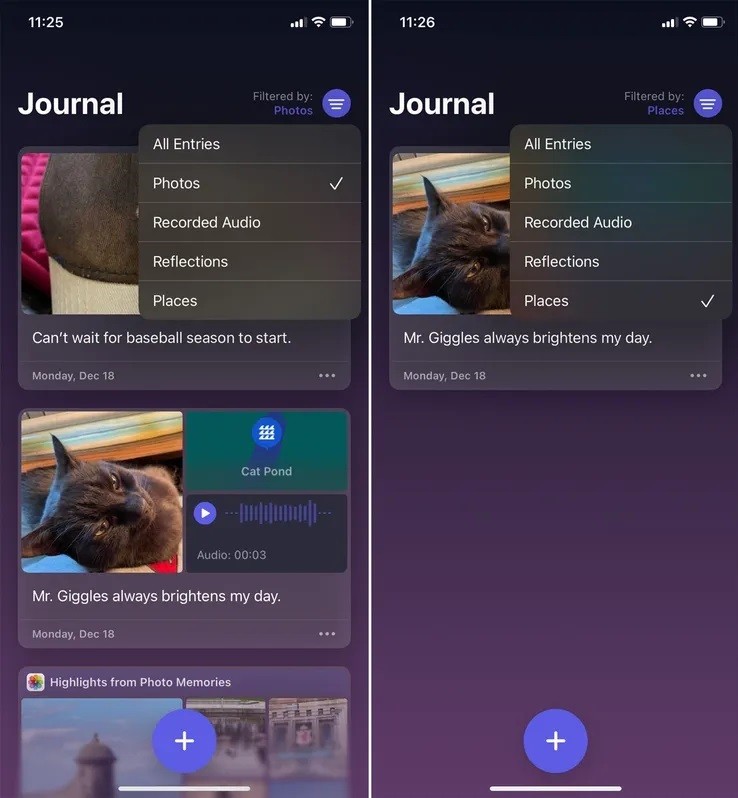
The ease provided by the Journal App is not limited to jotting down notes or entries but also to sorting them. When the Journal App gets filled with several entries, you can tap on the 3 dots at the top right corner of the screen. A list of filter options, such as all entries, photos, videos, audio, and places, will appear at the top right corner of your screen. Select an option, for example, audio, and the entry/entries with one will appear.
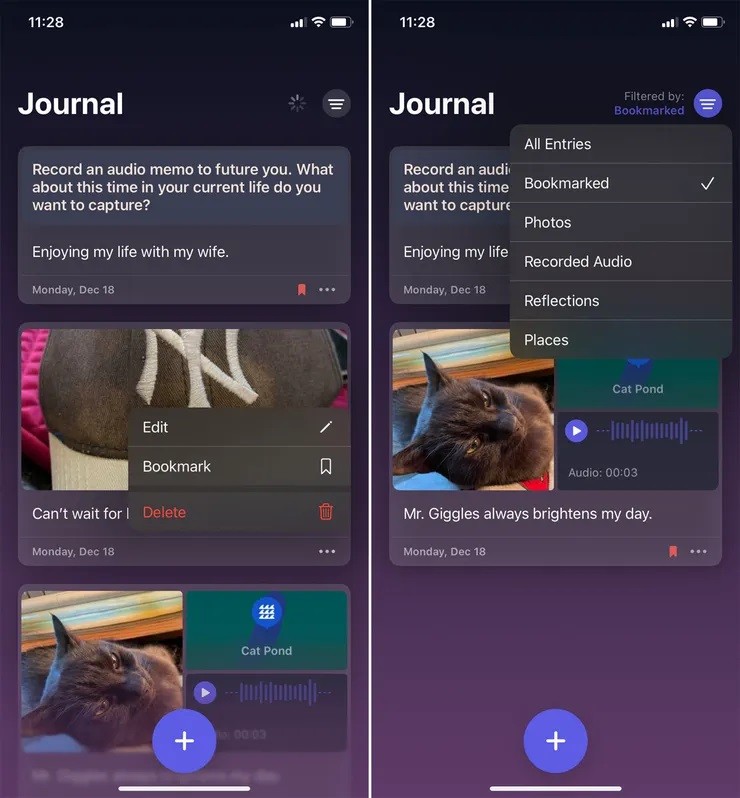
Once the Journal app gets filled with numerous entries, filtering them through the provided options will show various entries. Therefore, it is best to bookmark the best and most memorable entries by tapping on the ellipsis icon of the specific entry/entries and then clicking on the bookmark option.
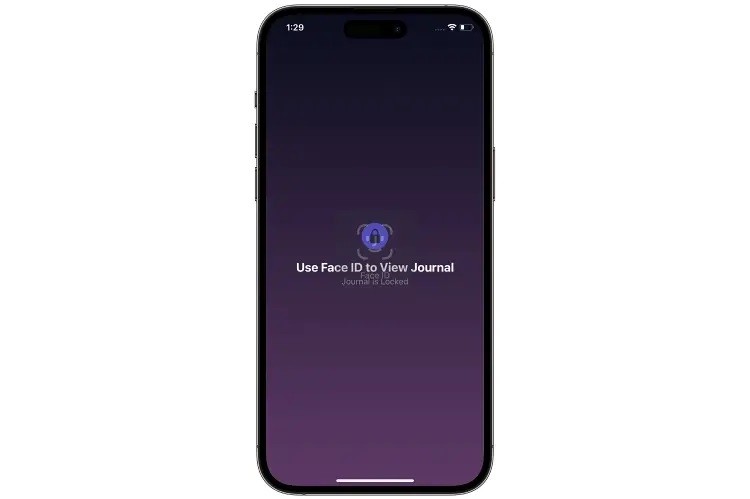
To protect your journal entries against unauthorized access, go to settings, then select Journal. Tap on the lock journal option and then set up a passcode, Face or tracking ID to lock your Journal.
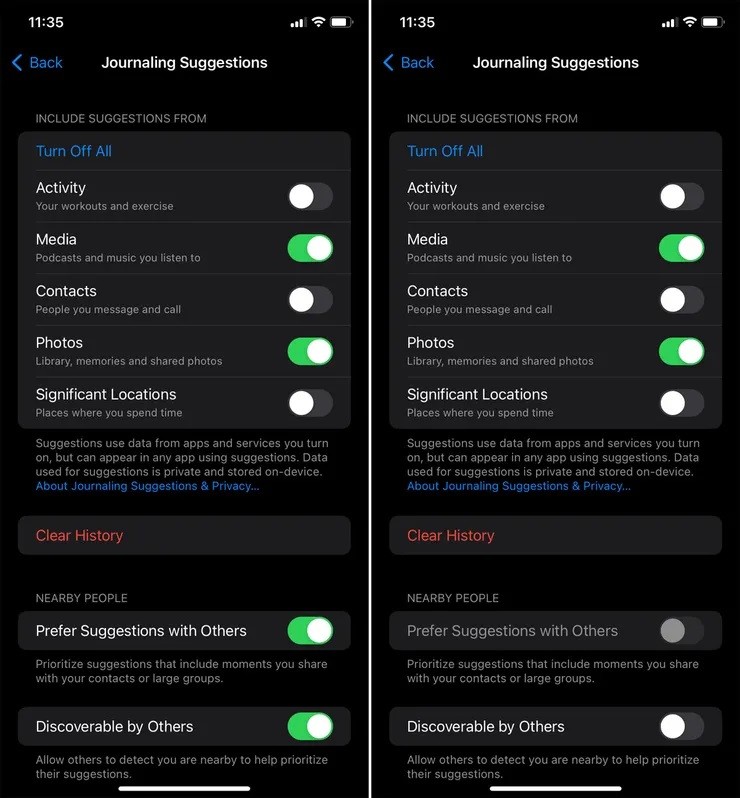
The Journal App allows users to customize the settings according to their convenience. The Journaling schedule options in the settings allow the users to save the day and time to remind them about adding the journal entries. The Journal app also facilitates the users by allowing them to save the pictures clicked through the Journal app to photos or turn them off. Moreover, the users are free to alter Journaling suggestions. For this, go to settings, then tap on the journal option. Click the ‘Journaling Suggestion’ option and then go to the ‘Suggestion privacy and security’ option. Finally, toggle on/off any suggestion you want.
The Journal App has unlimited features to enhance the user experience and make the journaling process memorable. The Journal App is not only a regular iOS application, but a relief in our low times.
Ramsha is a talented writer known for top-quality content on trending topics. Her excellence in research enables her to add value to businesses by driving online traffic with engaging and persuasive content.